Upgrading to a new version of Windows is supposed to improve performance, yet many people see the opposite. If your PC has slowed down after moving to Windows 11, here are some fixes to speed things up.
Note that it isn’t always Windows 11 that is causing the issue. Bloatware, unnecessary startup programs, or even the state of your hard drive can lead to a slow computer. Let’s look at some ways to fix these performance issues.
Fix 1: Update Windows 11
Windows 11 is still dealing with bugs and inefficiencies as a new operating system. Microsoft keeps patching these out, but that requires you to keep up with the latest Windows updates.
Updating Windows 11 is often the best way to fix a slow system, especially if the problem started only after transitioning to the new version of Windows.
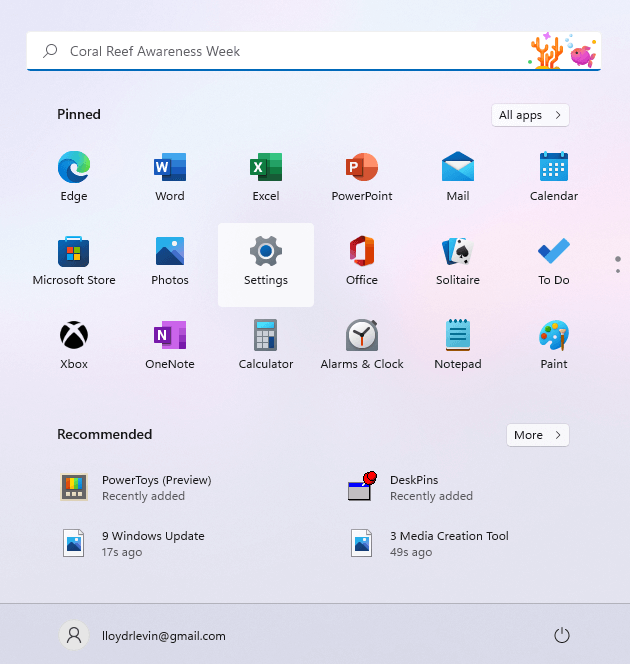
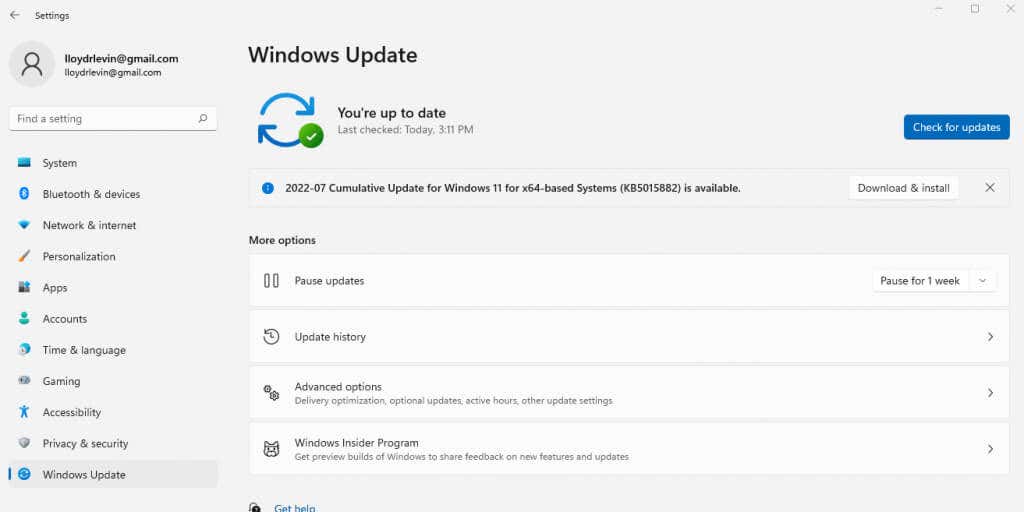
- To update Windows 11, head to Settings. You can find its gear icon in the Start Menu.
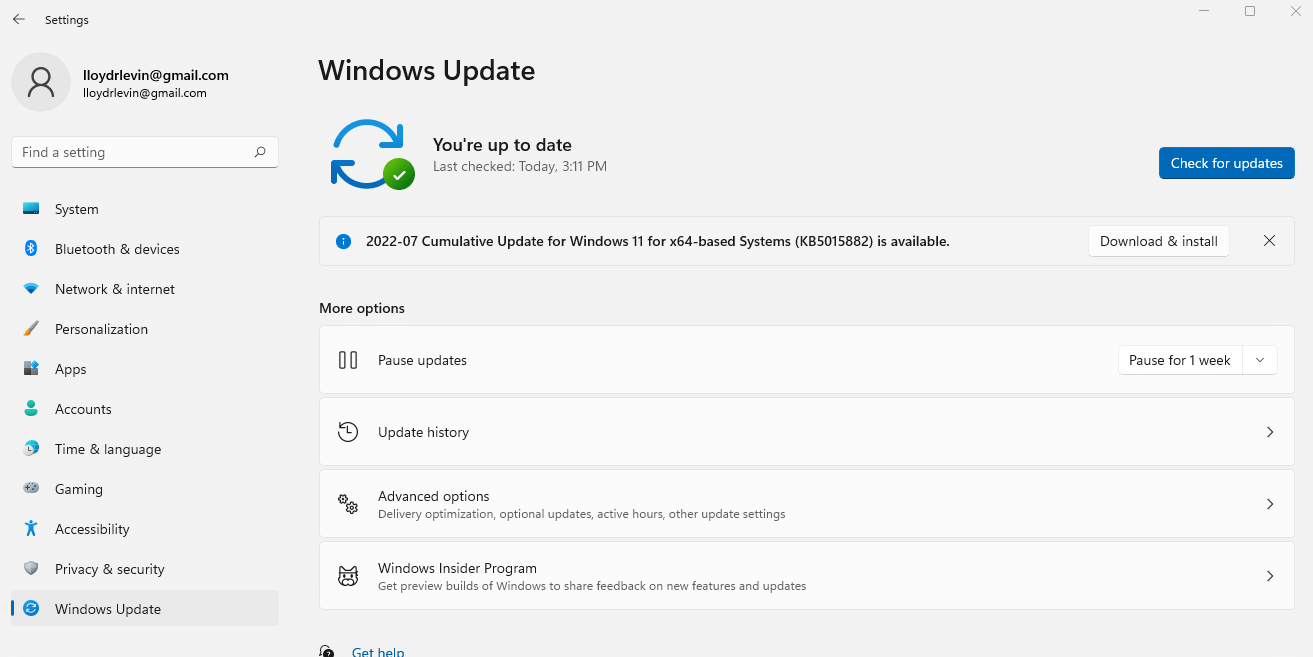
- Switch to the Windows Update tab to see if any updates are available for your computer. Click on Check for updates to refresh this list. You can then install any available updates using the Download & install button.
Fix 2: Disable Visual Effects
Windows 11 has revamped the UI to give a sleeker, more vibrant experience, but these fancy visuals come at a cost. Computers with dedicated GPUs will hardly feel the slight performance overhead, but everyone else will experience a significant slowdown.
To be clear, we are not talking about the new icons or the clutter-free menus – only the transparency and animation effects that slow down your computer. Disabling these will have minimal impact on your user experience but can significantly improve performance.
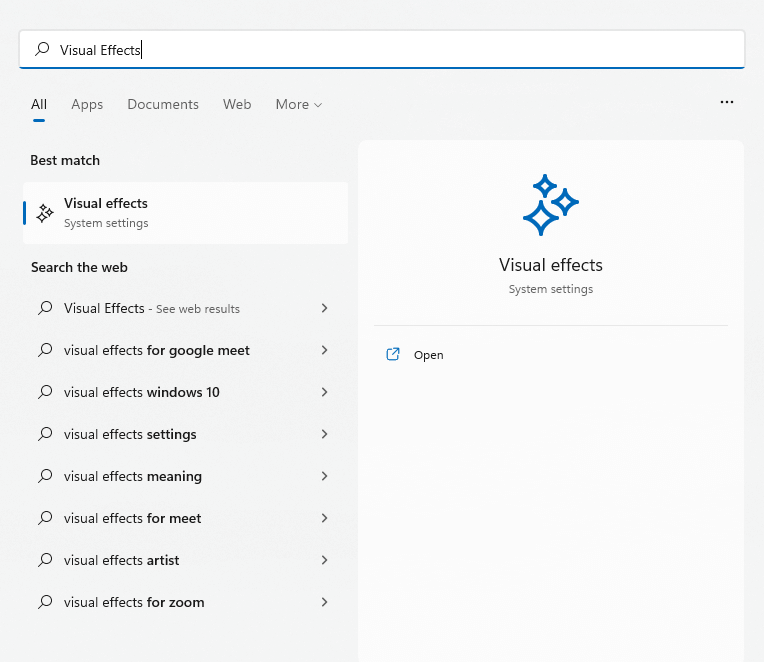
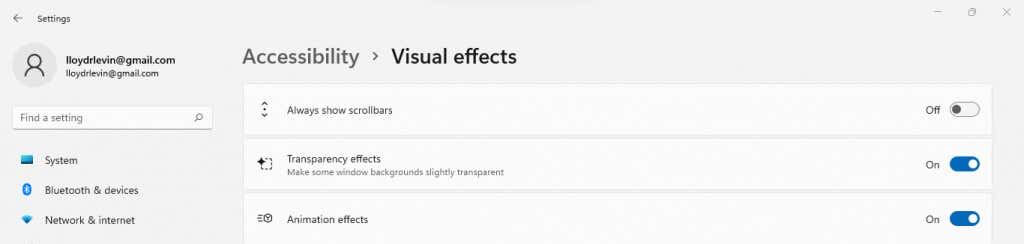
- If you want to disable Visual Effects on your Windows PC, search for the setting in the Start Menu.
- The relevant settings are located right at the top of the window. Disable Transparency effects and Animation effects by toggling them off.
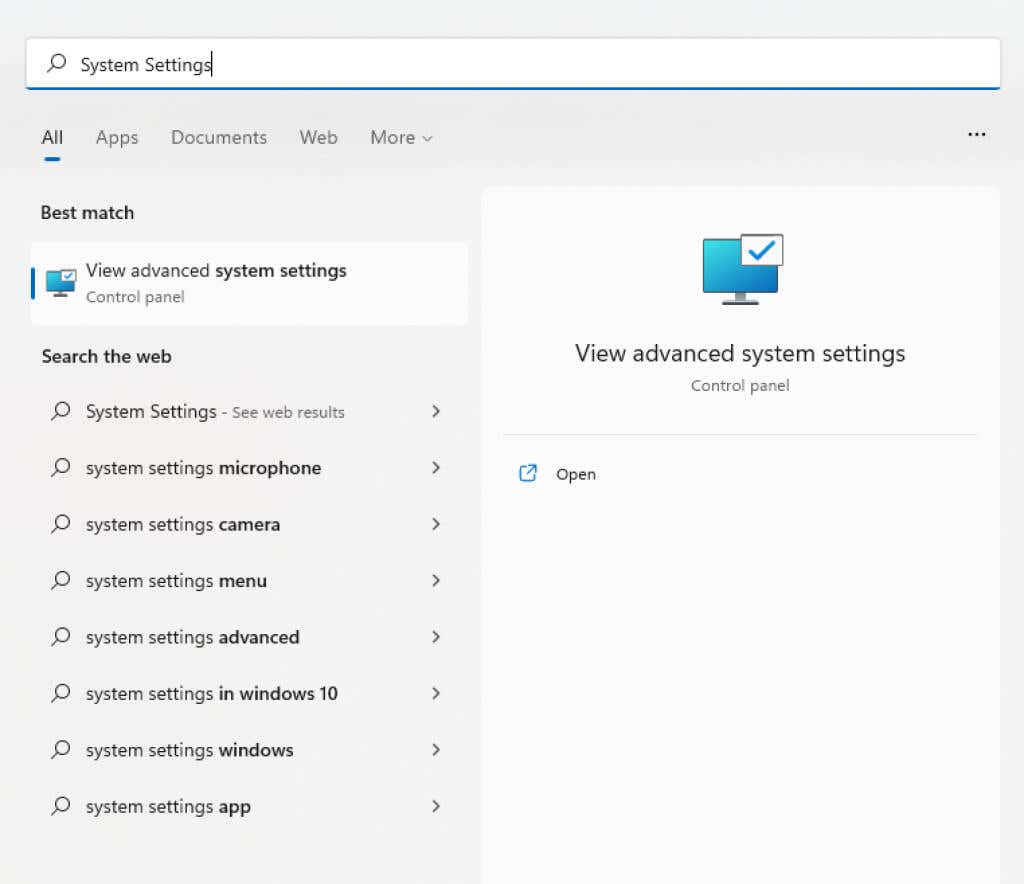
- Other visual effects are buried deep within advanced system settings. Search for System Settings in the Start Menu instead of manually going through the Control Panel.
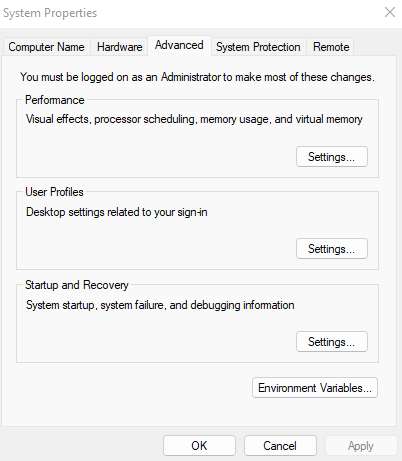
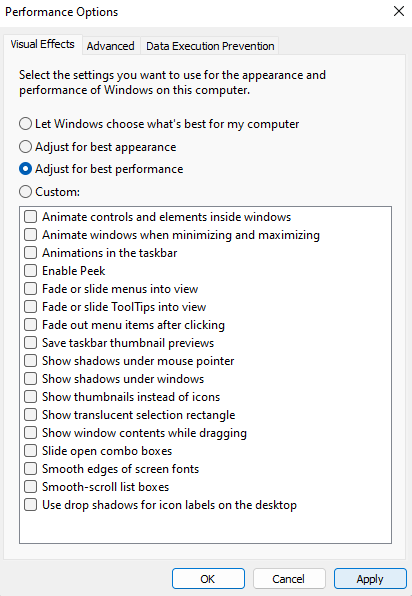
- You’ll be taken directly to the Advanced tab of System Properties. Visual effects are included in the first section – Performance. Click on the topmost Settings… button to proceed.
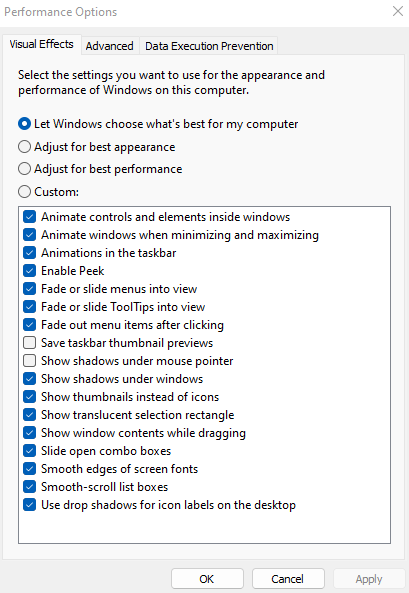
- All UI-related visual settings are listed in this window. You can uncheck these one by one or just Adjust for best performance to disable everything.
- Select Apply and reboot your computer to save the changes.
Fix 3: Remove Startup Programs
Some applications start up automatically every time you boot your computer. While this primarily includes critical system processes, some unnecessary apps also force their way into this list.
These startup programs delay your PC’s boot times and slow its functioning by cornering memory and CPU cycles better spent elsewhere. Some of these might even be viruses.
You can disable a few startup programs from the Task Manager, but you need a dedicated tool like Autoruns to clear them.
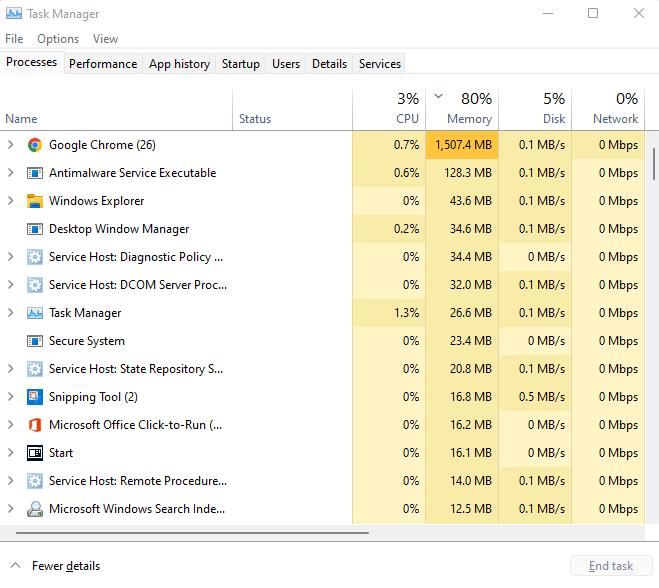
- For some apps, it’s possible to disable automatic startup from the Task Manager. Press Ctrl + Shift + Esc to open the Task Manager.
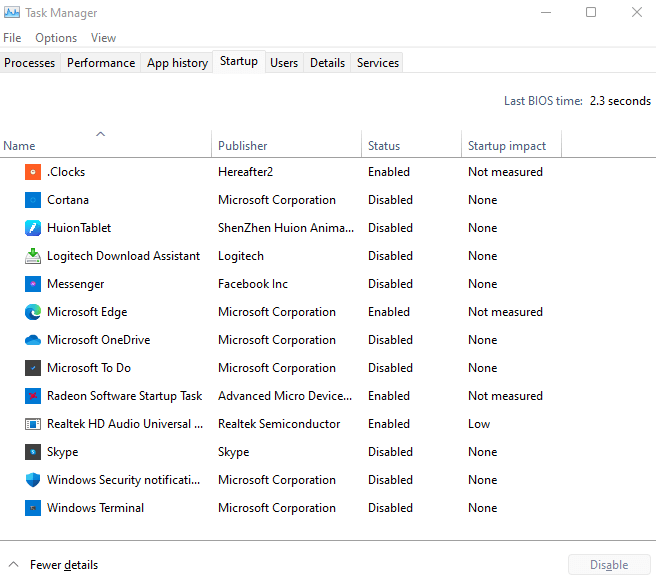
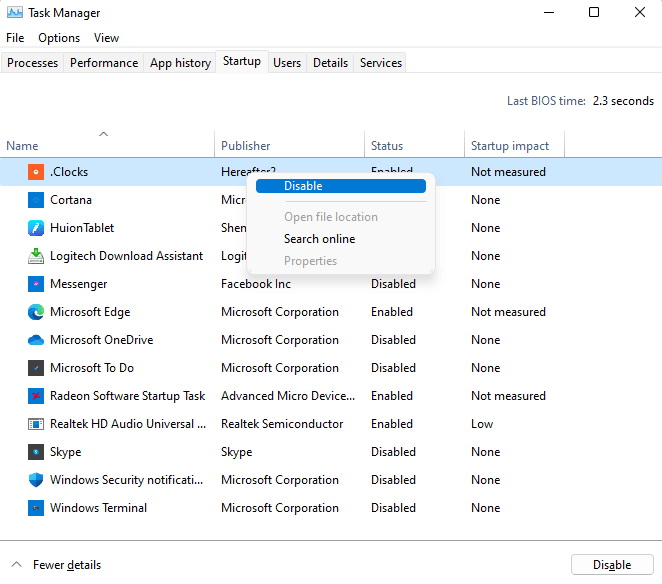
- Switch to the Startup tab to view all programs in the startup folder.
- Look at each program’s Status to find the apps starting up automatically. Right-click on unnecessary applications and select Disable.
Fix 4: Check the Hard Disk
Data corruption, fragmented files, mechanical failures – there are many reasons your traditional HDD might be slowing down your computer. Fortunately, Windows includes many utilities to fix some of these problems.
CHKDSK
CHKDSK is a command prompt utility included with Windows since its inception. The tool checks your hard drive’s file system and repairs any inconsistencies detected. While not all-powerful, it’s an excellent way to fix minor issues.
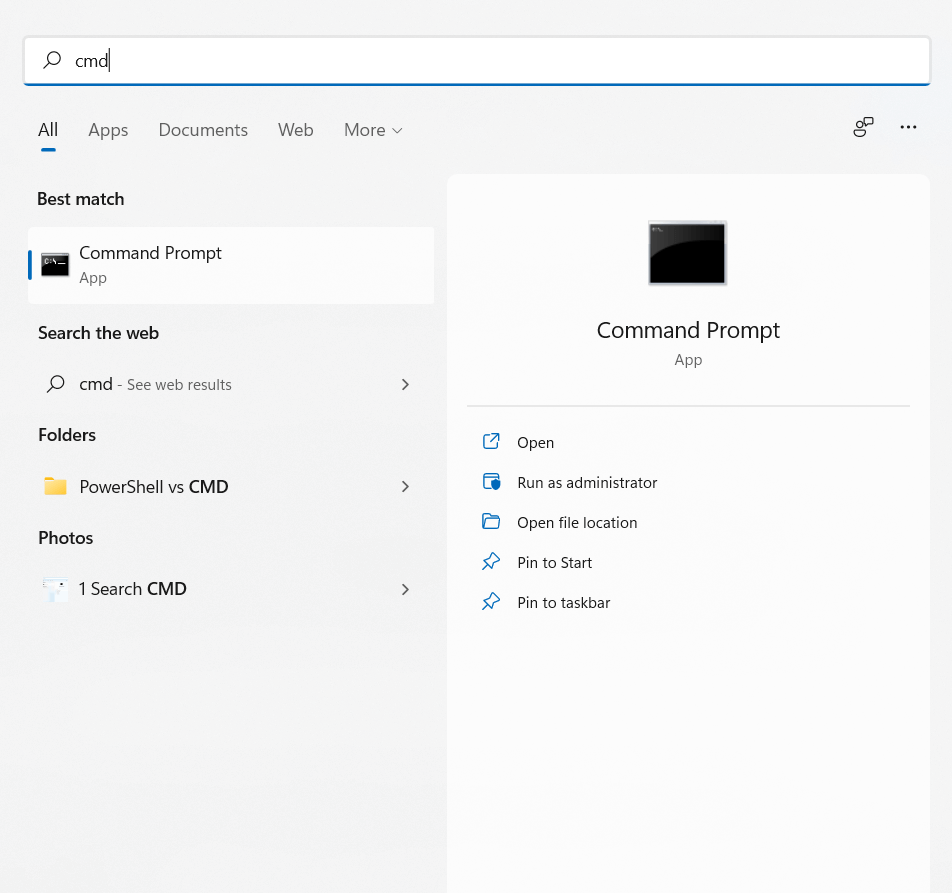
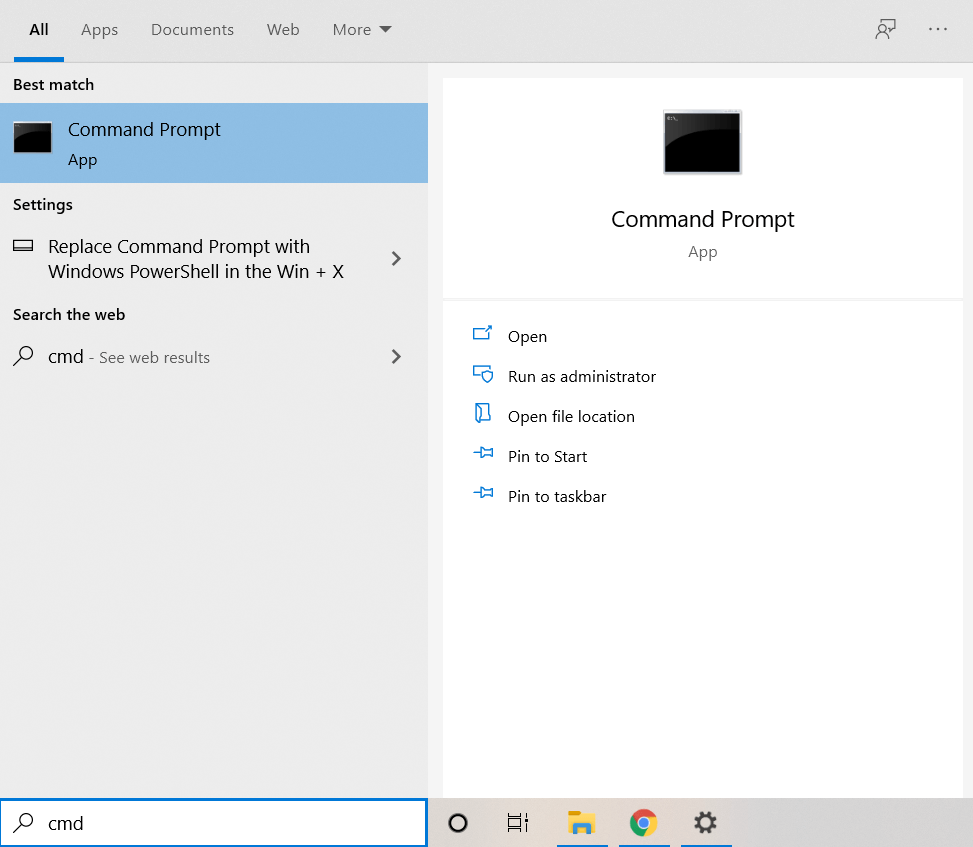
- To scan your hard drive for corrupted sectors, use the chkdsk command. First, run Command Prompt as an administrator. You can find the app by searching for cmd in the Start Menu.
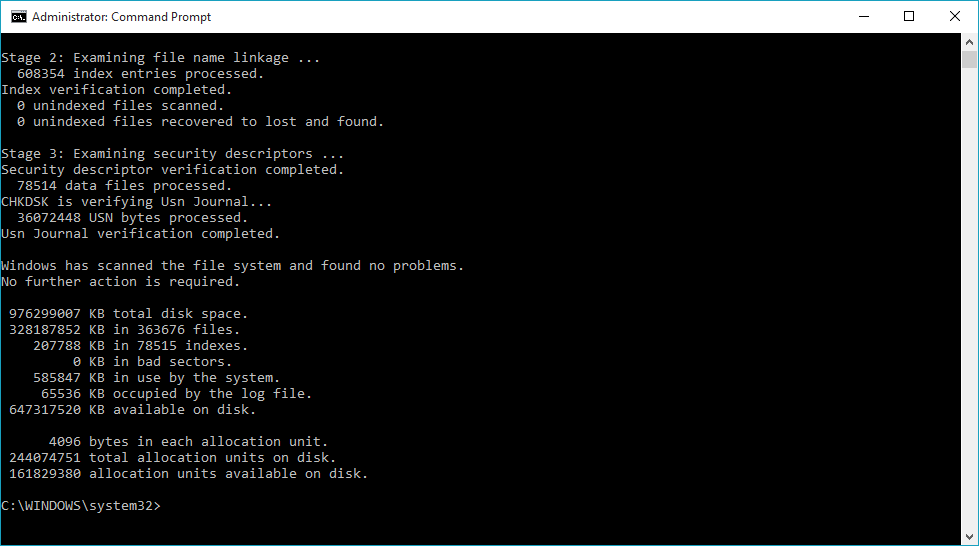
- Now just type chkdsk and press enter.
- The CHKDSK utility will now scan your hard drive and repair any errors it finds.
Optimize
Defragmenting the hard drive was an essential upkeep activity in older computers. Windows 10 has made the process automatic, doing away with the Disk Defragmenter tool.
That doesn’t mean you can’t optimize your drives manually. SSDs don’t need defragmentation, but an older HDD will benefit, especially if the scheduled Windows maintenance doesn’t take place due to frequent shutdowns.
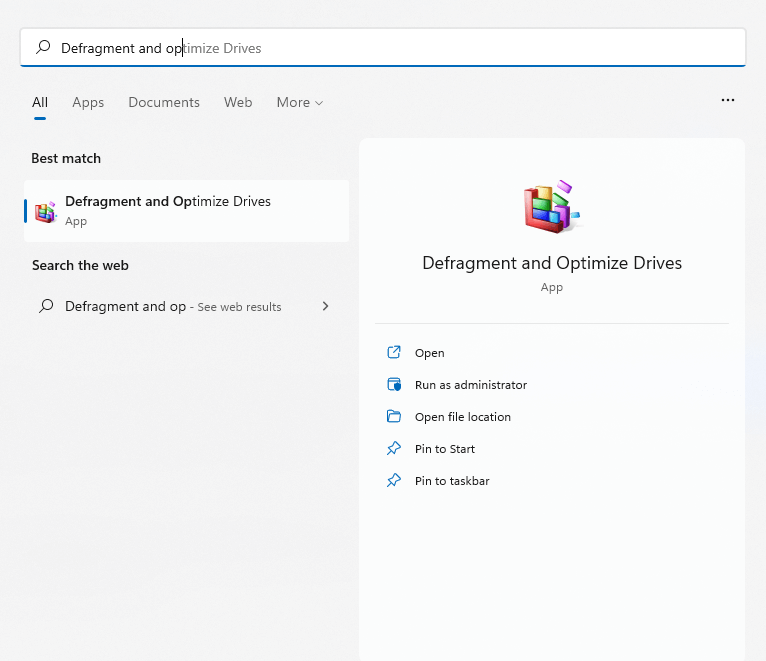
- Type Defragment and Optimize Drives in the Start Menu search box to run the new defragmentation utility.
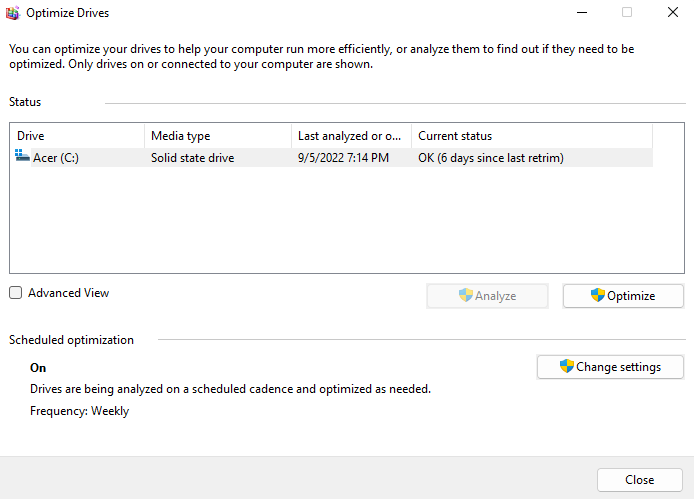
- The app lists all hard drives connected to your computer, their status, and their last analysis date. If you notice a high level of fragmentation, click on the Optimize button to defragment it.
SFC
Data corruption will occasionally spread to even system files. This is beyond the ability of CHKDSK to fix. You need to use the SFC and DISM commands.
System File Checker (SFC) is another command prompt utility that comes with all versions of Windows. SFC verifies the integrity of critical system files, replacing them with a backup copy in case they are corrupted.
Deployment Image Servicing and Management (DISM) is a relatively new addition. Found only in Windows 8 onwards, DISM repairs the Windows image by downloading the required files from Microsoft’s servers. This enables SFC to work correctly even if the local cache has been corrupted.
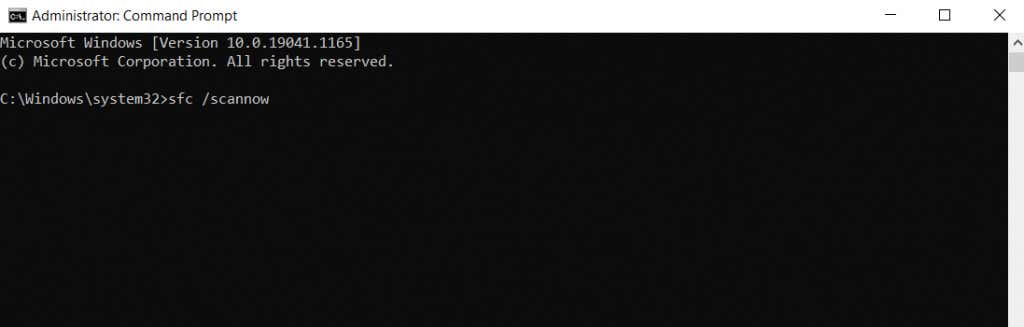
- To scan and repair system files on your PC, open the Command Prompt as an Administrator.
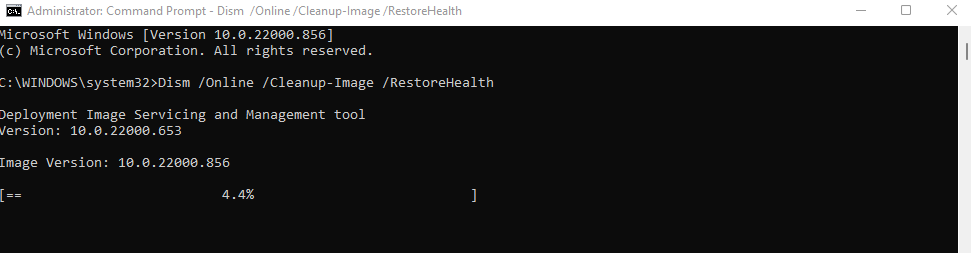
- Begin with the DISM command. Ensure you have internet connectivity and type Dism /Online /Cleanup-Image /RestoreHealth and hit enter.
- A Windows System Image will start downloading, replacing the current, possibly corrupted, version.
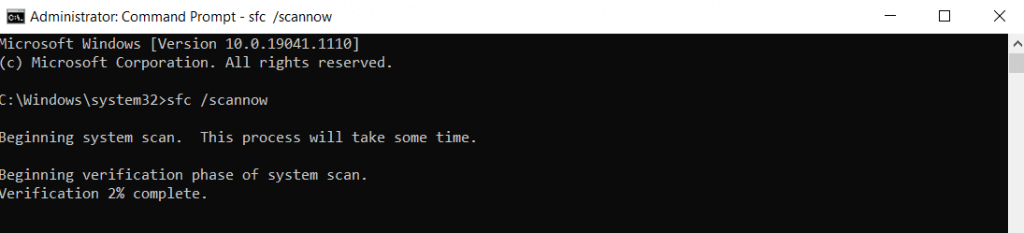
- Now you can proceed with an SFC scan. Enter sfc /scannow to check the files of the Windows operating system.
- Your system files will be verified and repaired using the Windows image downloaded by DISM. This fixes all system data corruption.
Fix 5: Upgrade to an SSD
If you are still using an old-school magnetic Hard Disk Drive (HDD), switching to a Solid State Drive (SSD) is the best way to get a speed boost.
Early SSDs were error-prone and failed quickly, but this is no longer a problem. Modern SSDs last just as long as traditional HDDs and perform far better.
Many SSD drives are available, but even the slowest versions can easily outpace a standard hard drive. And thanks to falling prices, buying an SSD is cheaper than ever.
Even if you aren’t keen on ditching your current drive, consider migrating Windows to an SSD. This will improve boot times, speed up your computer’s normal operations, and eliminate the possibility of fragmentation or mechanical failure.
Fix 6: Clean Up Your Computer
The RAM holds information while processing, but the hard drive’s free space is also important. Both SSDs and HDDs perform better when they have free space to work with.
And the easiest way to clear out that space is by removing unnecessary files and programs. This includes temporary files not being used by any active application and bloatware unnecessarily clogging up disk space.
Temporary Files
In older Windows versions, you had to open the temp folder and delete everything in it manually. While you can still do that, it’s more convenient to enable the automatic Storage Sense feature and let Windows take care of it.
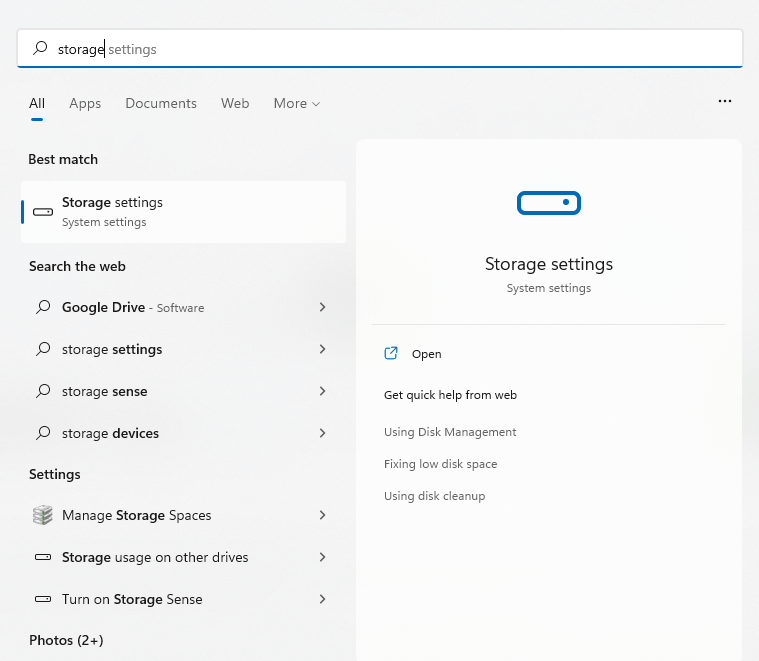
- To delete temp files, open the Settings app and head to System Storage, or search for Storage Settings in the Start Menu.
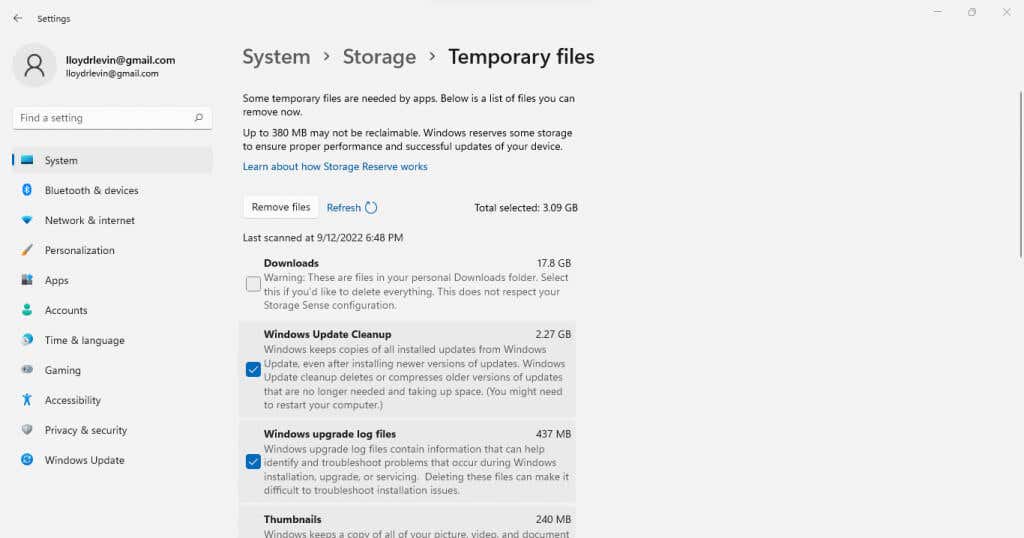
- Here you can toggle on the Storage Sense option. This will automatically remove any temporary files and free up space on the drive. You can also select the Temporary Files option to view and delete these files right now.
- The files are divided by their types, allowing you to decide what is worth keeping. Check the items you want to remove and click on the Remove files button.
Bloatware
Bloatware consists of applications on your computer that are never used and are unnecessarily taking up storage space and other system resources. Such apps are usually installed during the installation process of different applications without your express knowledge.
You can remove most of these apps yourself by manually uninstalling them one by one. A better approach is to use a dedicated bloatware removal tool.
These utilities can find and remove bloatware from your computer with a few clicks, deleting them from even the system Registry. Some can even delete built-in Windows applications like Onedrive, deleting everything you don’t need.
Fix 7: Update Graphics Drivers
It’s a good idea, in general, to keep your device drivers updated, but no driver has a bigger impact on performance than graphics. A more optimized GPU driver can speed up your computer significantly, especially if you like gaming.
And the best way to update the graphics drivers is to download and install them manually. This way, you automatically get the latest drivers meant for your GPU rather than the generic ones fetched by Windows.
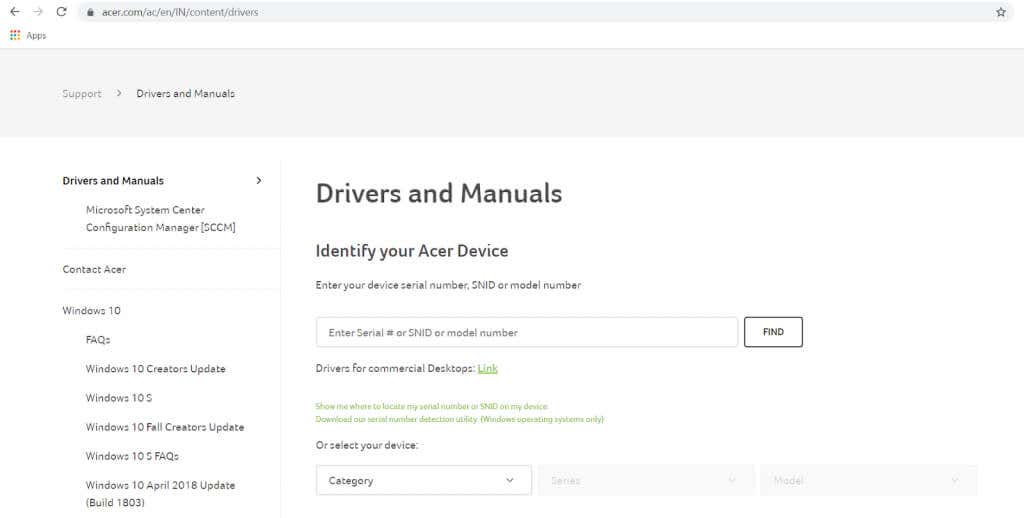
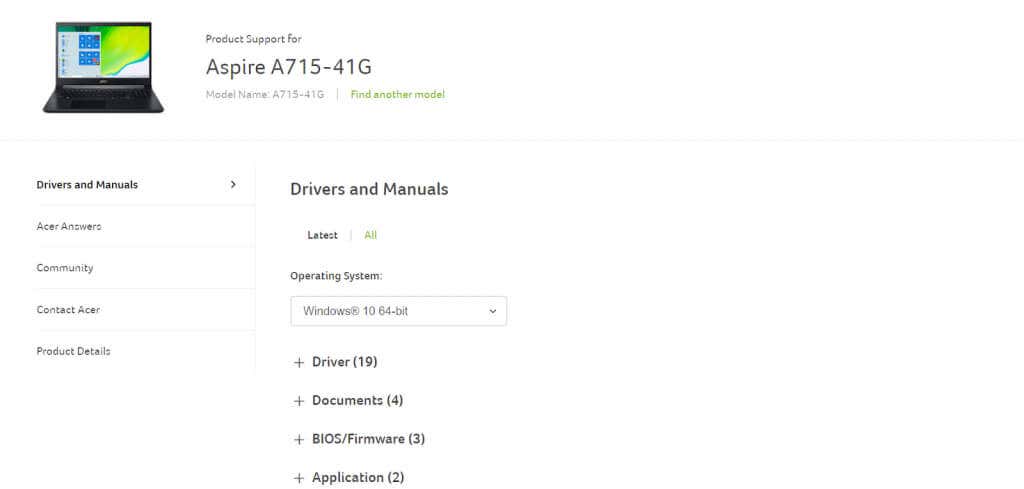
- To find the latest drivers for your graphics card, head to the manufacturer’s website. If you are using a laptop, you can also find the correct drivers on the laptop brand’s website.
- Enter the model number of your GPU (or laptop) to locate the appropriate drivers.
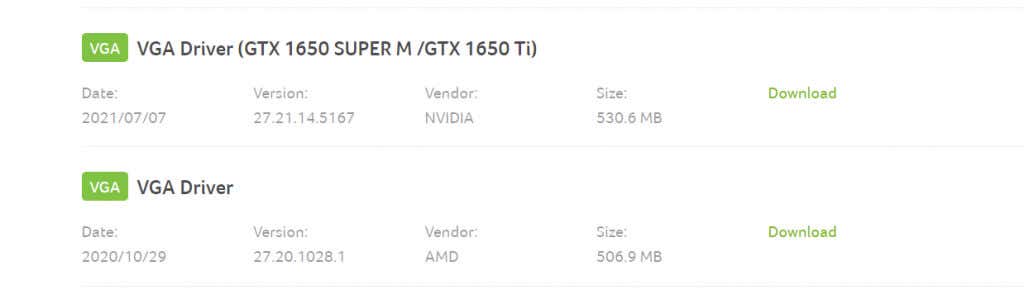
- Laptop driver download pages list all drivers that can be updated on the device. Scroll down until you find the VGA or graphics drivers, and download them. There might be two packages available for systems with a discrete graphics card and integrated graphics.
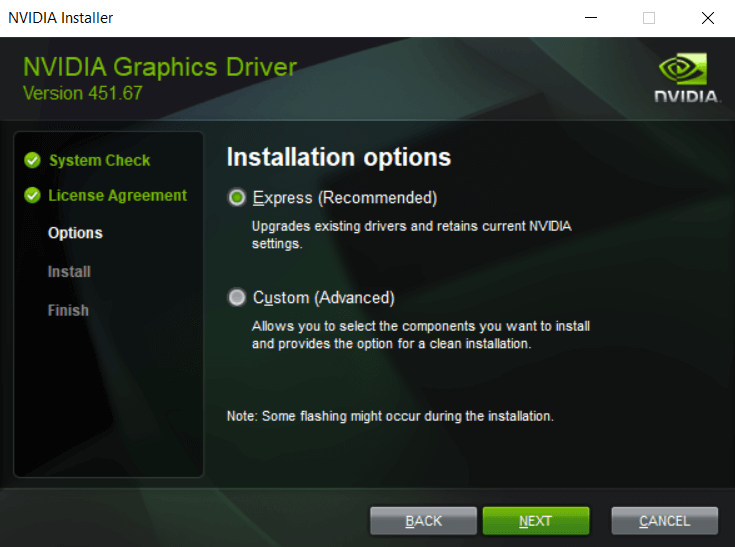
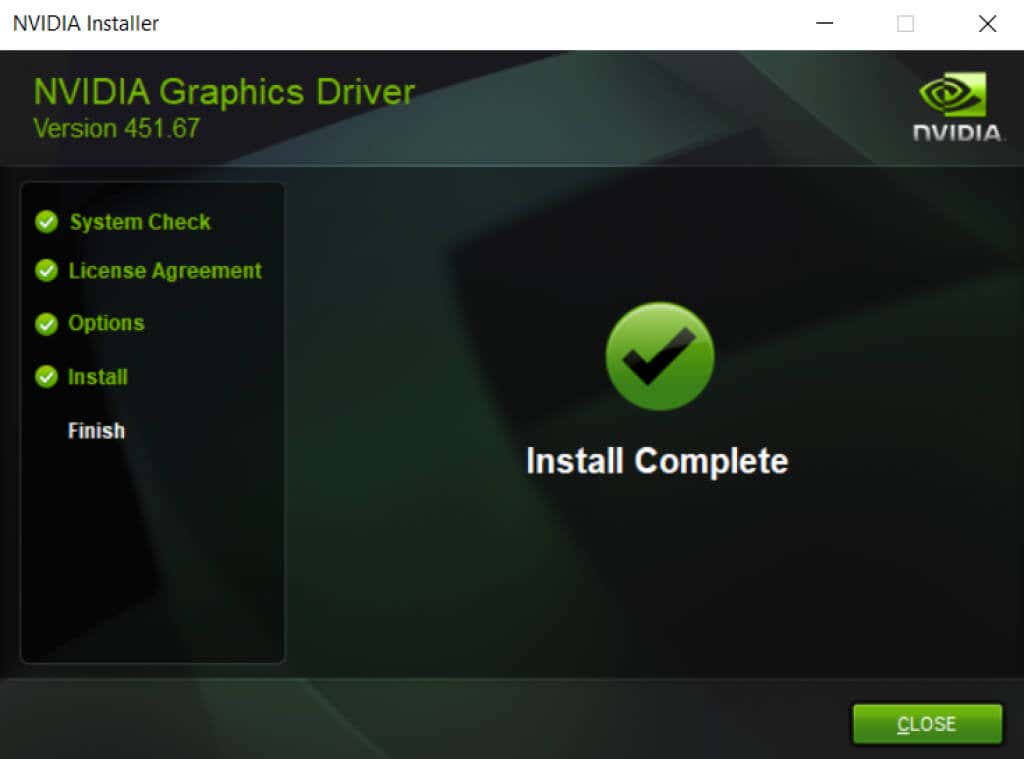
- Run the installer to check if your system’s hardware is compatible with the new driver. If everything looks good, you’ll see the option to upgrade the graphics drivers.
- Restart the computer after installation is complete to apply the changes.
Fix 8: Uninstall Third-Party Antivirus
This fix may seem counterintuitive, but removing third-party antivirus applications can greatly speed up your computer. And thanks to the improved performance of the built-in Windows Defender, you don’t have to worry about security either.
In earlier versions of Windows, third-party antivirus software was necessary to safeguard your computer. Web browsers weren’t particularly secure, viruses were rampant, and Microsoft’s own security features were just not good enough.
But that has changed. Windows Defender is now a fully-featured antivirus tool that can successfully detect and remove malware successfully. Browsers like Chrome implement more security checks, and Adobe Flash has been disabled. You can safely uninstall your third-party antivirus app and get an immediate boost in performance on your Windows 11 computer.
What Is the Best Way to Fix a Slow Windows 11 PC?
Three crucial factors to a smooth PC are keeping your computer updated, cleaning up junk files and applications, and ensuring your hard drive is in good health.
And with Windows 11, these tasks are easier than ever. Deleting temporary files or defragmenting the hard drive is automatic, and Windows Updates often update drivers as well.
The improved security features mean you can even do away with your third-party antivirus, removing a major culprit slowing down your PC. If your PC is still slow, try out some of the other fixes outlined in this article to get it running smoothly again.
source
https://helpdeskgeek.com/windows-11/is-your-windows-11-pc-slow-try-these-8-fixes/


Σχόλια
Δημοσίευση σχολίου