Microsoft Word is a versatile application that you can use for more than essays and articles. Along with making a booklet and creating a flyer, you set up your own form or checklist.
One thing that forms and checklists have in common is the checkbox. If you plan to create one of these items, we’ll show you how to insert a checkbox in Word on Windows, Mac, and the web.
Insert a Checkbox in Word on Windows
In Word on Windows, you can insert a checkbox and adjust its properties. This allows you to mark the checkbox digitally or print the document to mark one physically.
Enable the Developer Tab
Before you can add the checkbox in Word, you’ll need to display the Developer tab which contains the checkbox form control.
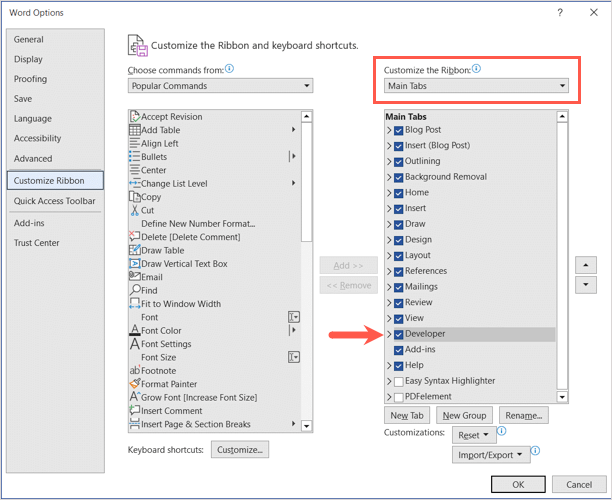
- Open your Word document, go to the File tab, and select Options on the bottom left.
- When the Word Options window appears, choose Customize the Ribbon on the left side.
- On the right, select Main Tabs in the Customize the Ribbon drop-down menu.
- Check the box for Developer in the list.
- Select OK to save your change.
Add the Checkbox
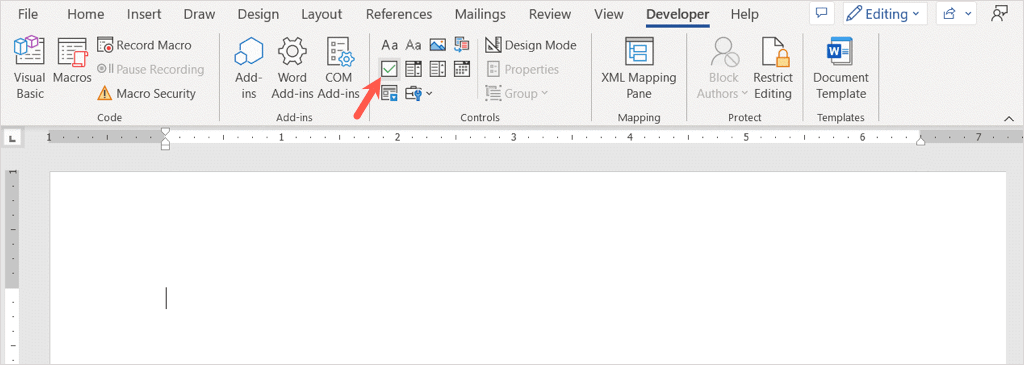
Now that you have the Developer tab visible, head over to it.
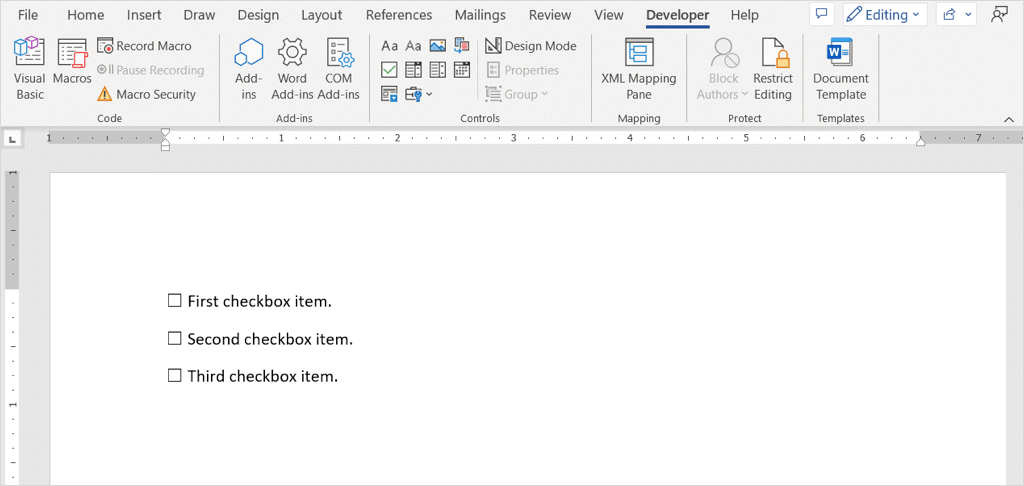
- Make sure your cursor is placed in your document where you want the checkbox.
- Go to the Controls section of the ribbon and select the Check Box Content Control.
- You’ll see your checkbox pop right in.
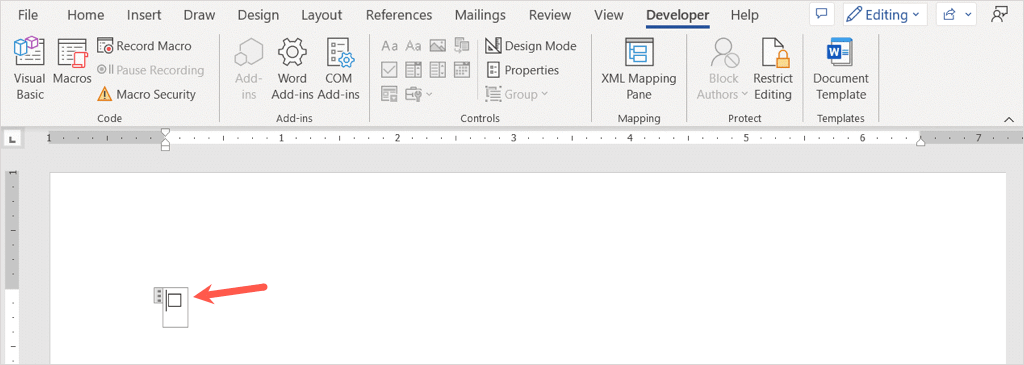
- Place your cursor to the right of the checkbox and type a space or use your Tab key. This provides more spacing before your text. Then, add your checkbox item.
- Continue the same process to add more checkboxes for a checklist or fillable form.
Customize the Checkbox
Once you add your checkbox, you can adjust its properties. This lets you lock the box so it can’t be edited and change the checkbox symbol.
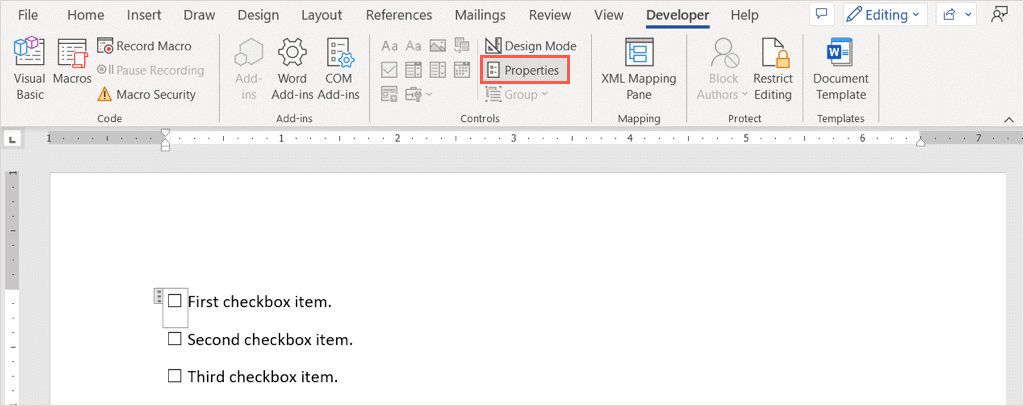
- Select the checkbox, go to the Developer tab, and pick Properties in the Control section of the ribbon.
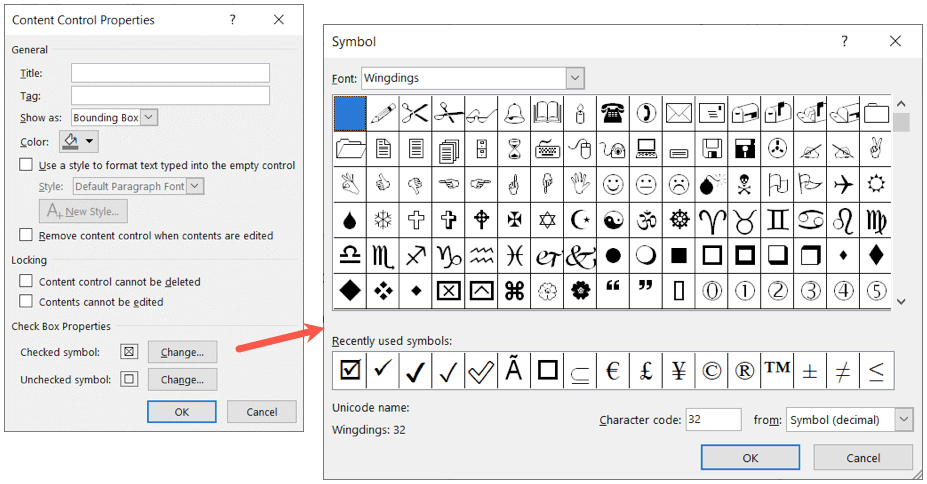
- In the Content Control Properties window, you’ll see all those items you can adjust.
- Use the General area to add a title or tag to the checkbox or the Locking area to prevent the checkbox from being edited or deleted.
- If you want to change the X symbol used for a checked box, go to the Check Box Properties area at the bottom. Select Change next to Checked symbol and pick the symbol you’d like to use such as a checkmark. Select OK and you’ll see the new symbol appear in the Properties window. You can also change the unchecked symbol if you like.
- When you finish adjusting the properties, choose OK to save your changes.
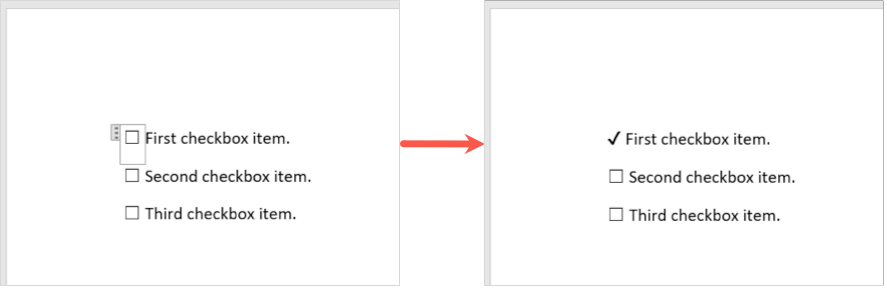
Check or Uncheck the Box
If you want to use the checkboxes in Word on your desktop, simply click the checkbox to mark or unmark it.
Insert a Checkbox in Word on Mac
While inserting a checkbox in Word on Mac is similar to that on windows, there are a few differences for customizing and marking the checkbox.
Enable the Developer Tab
You’ll still start the same way which is by enabling the Developer tab to add the form control.
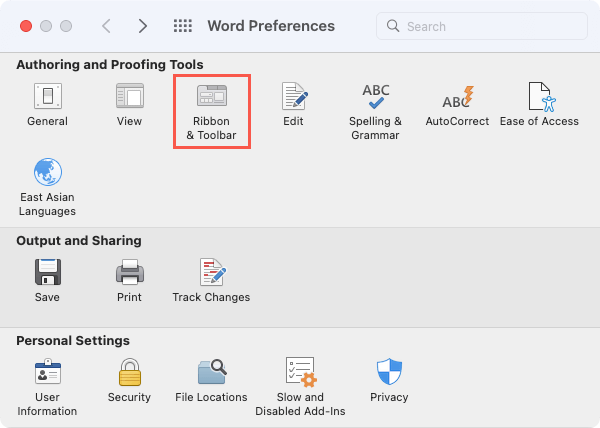
- To display the Developer tab in Word on Mac, go to Word > Preferences in the menu bar.
- Select Ribbon & Toolbar.
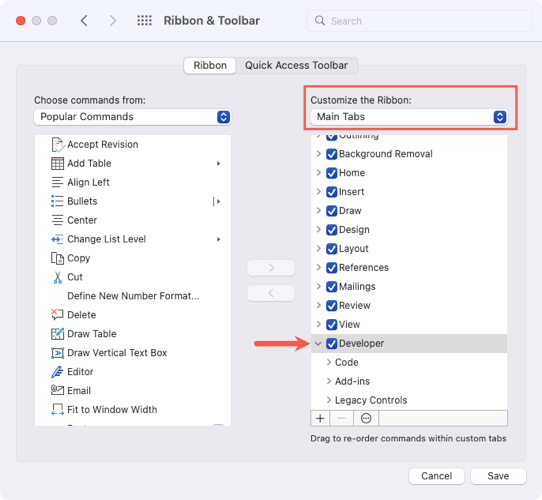
- Select Main Tabs in the Customize the Ribbon drop-down list.
- Check the box for Developer in the list.
- Select Save.
Add the Checkbox
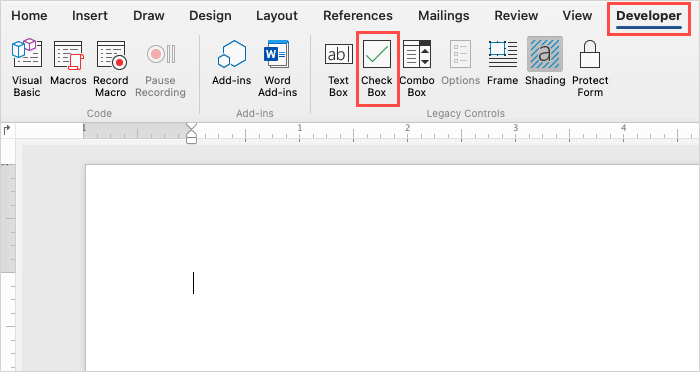
To add the checkbox, place your cursor in the document where you want it.
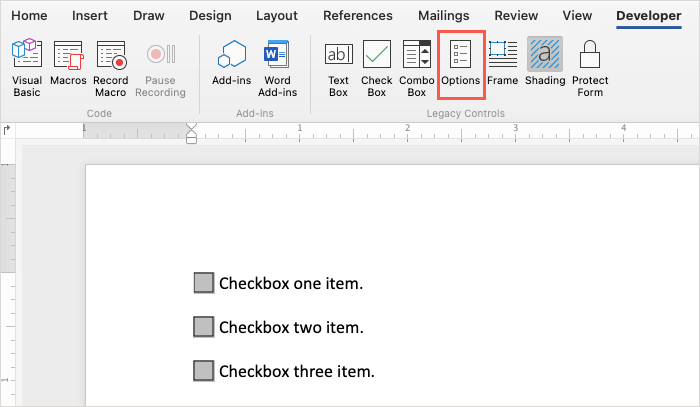
- Head to the Developer tab and select the Check Box button in the Legacy Controls section of the ribbon.
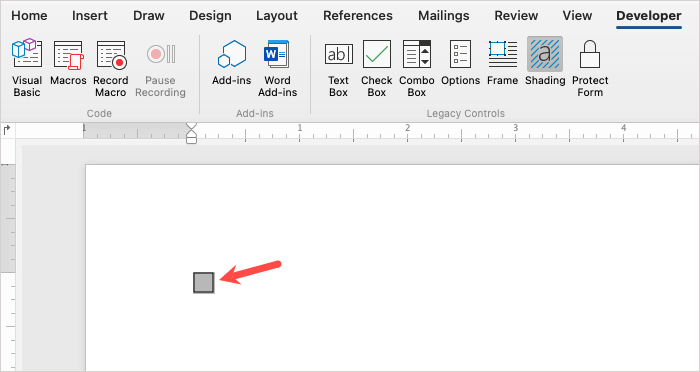
- You’ll see your checkbox appear in the document.
- Place your cursor on the right side of the checkbox and enter a space or use your Tab key for more spacing between the box and your text. Then, type your checkbox item.
- Continue the same process to add more checkboxes for a checklist or form.
Customize the Checkbox
Once you insert your checkbox, you can adjust a few of its properties although different than the options on Windows.
- Either double-click the checkbox or select it and pick Options in the Legacy Controls section of the ribbon on the Developer tab.
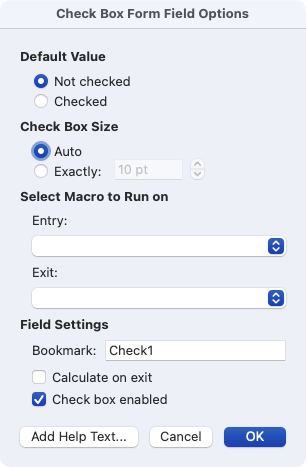
- Use the Default Value section to check or uncheck the box and the Check Box Size section to resize the checkbox. If you want to run a macro on entry or exit, use the drop-down boxes to Select the Macro to Run on. Finally, you can adjust the Field Settings if you like.
- Select OK to save your changes.
Check or Uncheck the Box
If you plan to use the checkboxes in Word on your Mac rather than printing, you have two ways to mark a checkbox.
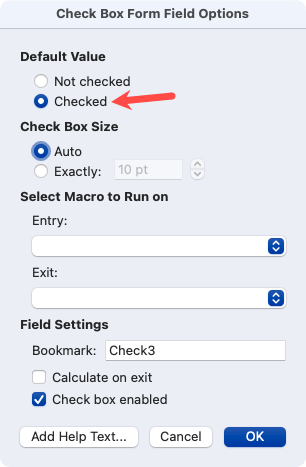
Method one: Double-click the checkbox or select it and pick Options in the ribbon. Choose Checked under Default Value and select OK.
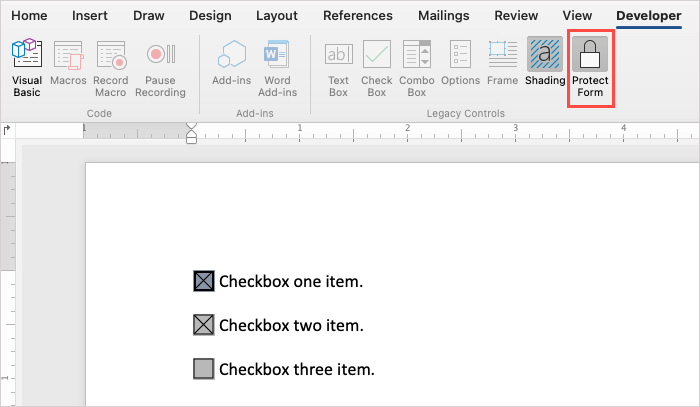
Method two: Select Protect Form on the Developer tab. Then, click a box to mark it as checked. When you finish, you can select Protect Form again to disable it.
Insert a Checkbox in Word on the Web
Microsoft Word on the web works a bit differently than its desktop counterparts. You won’t see a form control to add a checkbox. Instead, you can use the bullet list feature.
Because of this limitation, you are unable to digitally check the boxes that you insert. This makes Word for the web a more viable option for printed pieces so you can mark the checkboxes with a pen or pencil.
- Visit Word on the web and sign in with your Microsoft account. Open a document or create a new one.
- Place your cursor in the document where you want a checkbox.
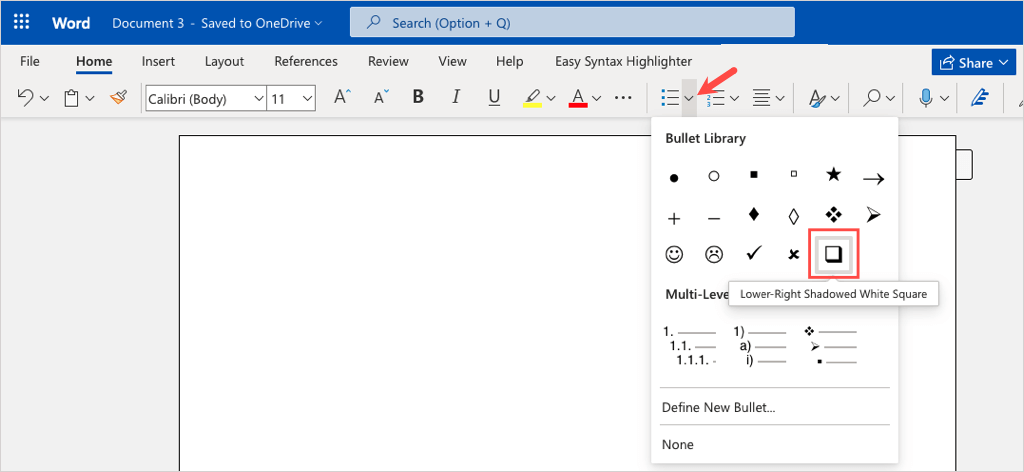
- Go to the Home tab and select the Bullets drop-down arrow.
- Pick the Lower-Right Shadowed White Square in the Bullet Library.
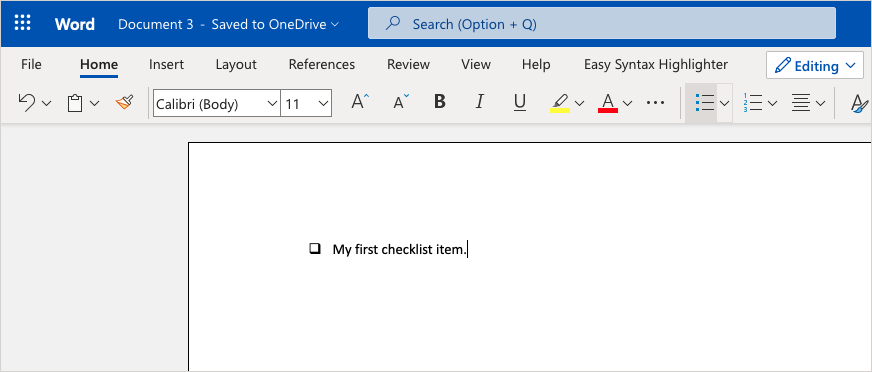
- When the box appears, type your first item next to it.
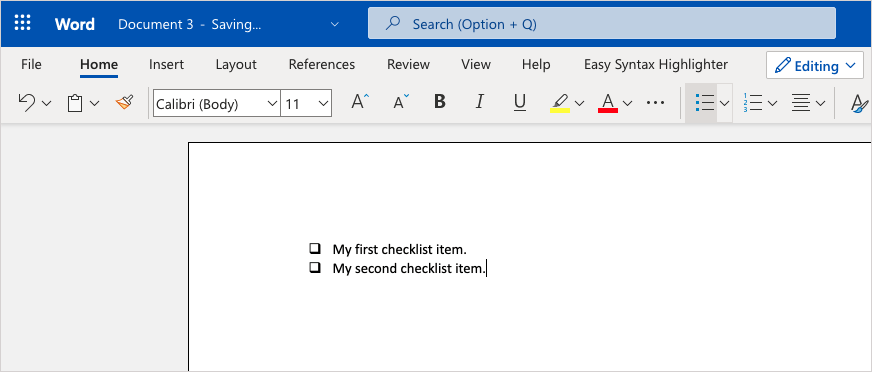
- To create a checklist this way, press Enter or Return after adding your first list item.
- You’ll see another box appear beneath ready for your second item. As you can see, the bullet style works the same as other styles for bullet lists in Word.
- To print your form or checklist, select File > Print and follow the prompts to download your file. Then, print the document from your computer as you normally would.
Now that you know how to insert checkboxes in Word, take a look at these useful tips and tricks for doing other things in Microsoft Word.
source
https://helpdeskgeek.com/how-to/how-to-insert-checkboxes-in-microsoft-word/


Σχόλια
Δημοσίευση σχολίου