When you have more work than you can fit on one (or even two) screens, you can use virtual desktops in Windows 11 to quickly switch between different modes of work or play.
Virtual Desktop features have been a mainstay of macOS and Linux for many years. Before Windows 10, you had to use third-party apps to get the same functionality. In Windows 10, Virtual Desktops became a new built-in feature, and with Windows 11, it’s been polished to a new level of shine.
Virtual Desktops in a Nutshell
Virtual desktops are like having access to multiple virtual monitors on one screen.
Each virtual desktop has its own windows and configuration, and you can switch between them with a keyboard or mouse shortcut.
People use virtual desktops differently. For some, it’s a handy way to keep work and personal computing separate. For others, it’s a good way to separate certain types of tasks (like keeping communication apps on one desktop and coding on another, for example). And for some, it’s a way to distinguish between different projects.
For example, you could have your torrent client or video conversion jobs running on a different desktop while working with a web browser and browser in the foreground.
Viewing Your Current Desktops
Before you begin creating and managing virtual desktops, it’s helpful to know what desktops are currently active and how to check them at a glance.
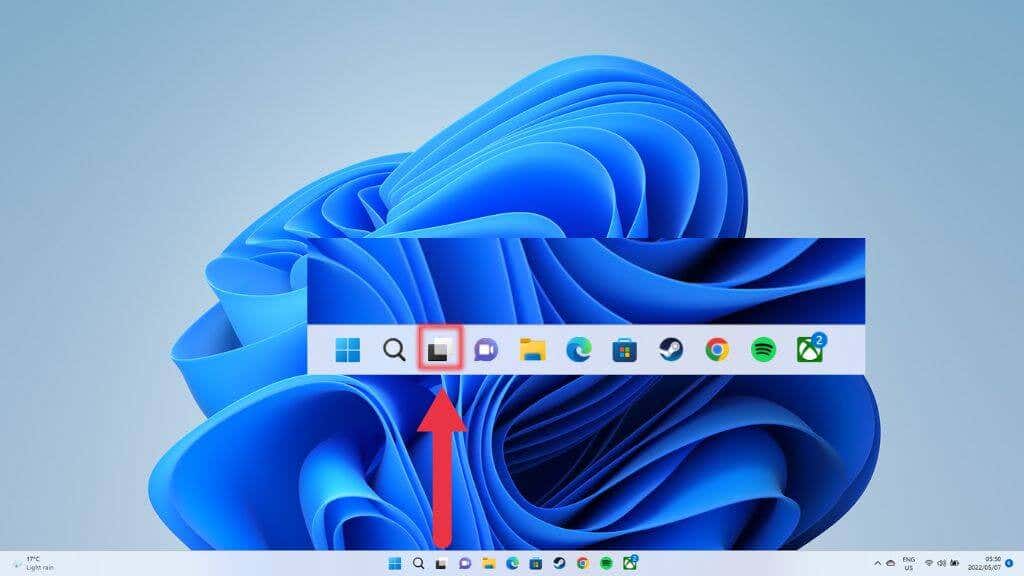
The Taskbar has a dedicated Task View button that activates the overview of active virtual desktops. The Task View icon looks like two overlapping squares—one light and one dark—as shown below.
A faster way to get to the same overview screen is to use its keyboard shortcut. Simply press Windows Key + Tab.
How to Create Virtual Desktops in Windows 11
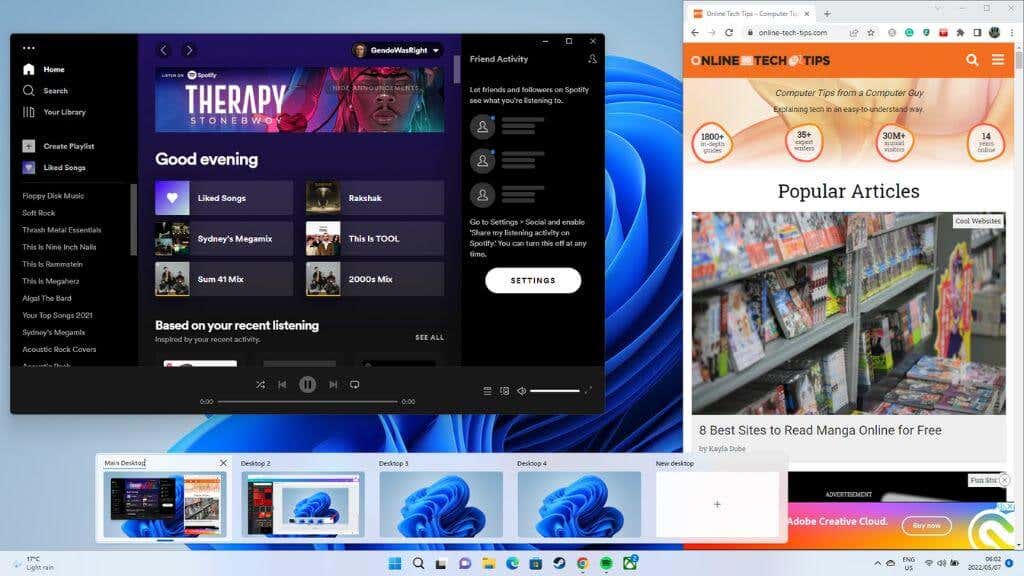
The fastest way to create new virtual desktops is to hover over the taskbar button mentioned above and select the new desktop button (+) on the far right of the existing virtual desktops.
You can also use Windows + Ctrl + D to make a new desktop appear. You’ll be taken to the new empty desktop immediately, but your previous desktop with all its apps is still there and unchanged.
Naming or Renaming Virtual Desktops
It’s helpful to give your desktops names that reflect their purpose. You can give them names or change their current names in the preview mode mentioned above. Simply activate the mode and then click on the existing name.
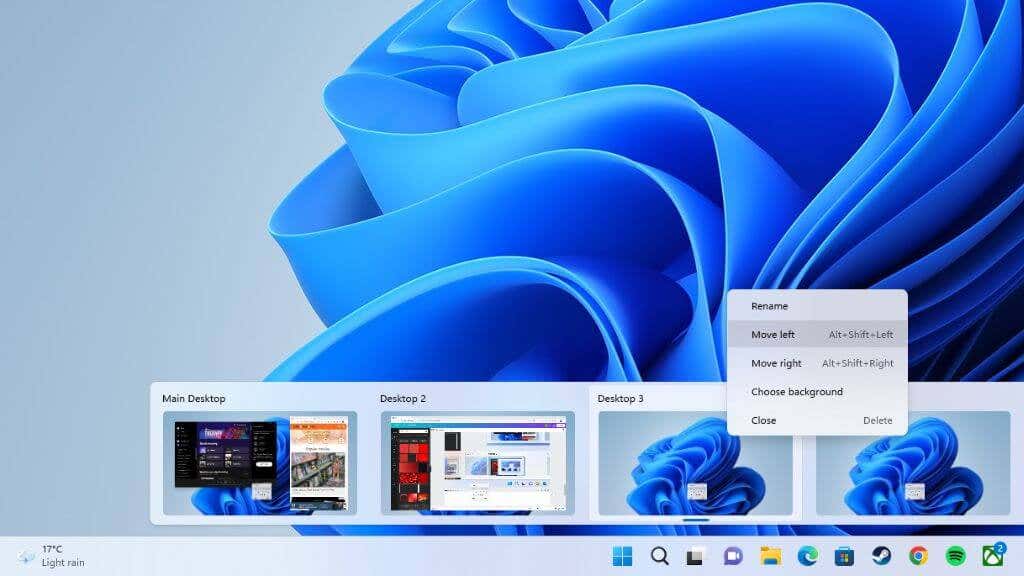
Alternatively, in Task View Mode, right-click on the virtual desktop thumbnail and select Rename.
The default naming convention is Desktop1, Desktop 2, and so on. Enter the new name, and it will remain until you decide to change it.
Changing the Order of Your Desktops
Depending on your workflow, you may want your desktops in a particular order. There are two ways to change the order of existing virtual desktops.
A fast and elegant way is to use the desktop preview function. Hover your mouse pointer over the Task View icon and drag the desktop thumbnails into your preferred order.
You can also right-click on any desktop thumbnail in that list or Task View mode and select Move Right or Move Left to change the order.
The keyboard shortcut Alt + Shift + Left Arrow or Right Arrow achieves the same result.
Switching Between Desktops
Now that you have a bunch of desktops with unique names, in the order you want them, how can you switch between them?
The best way to efficiently switch between desktops is by pressing Win + Ctrl + Left Arrow or Right Arrow.
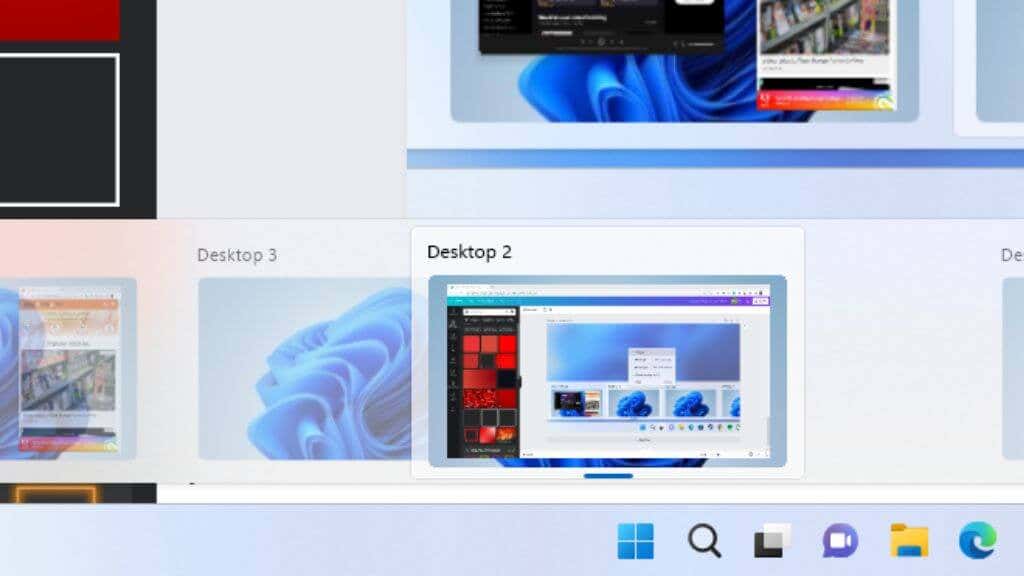
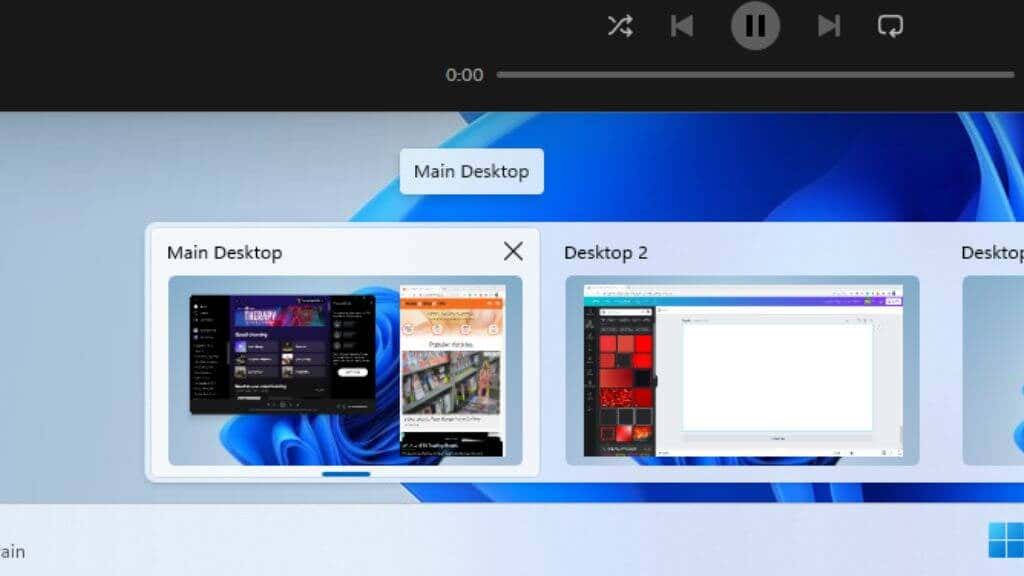
Of course, this moves you along the open desktops sequentially. If you want to jump directly to a specific desktop, you can do it from the desktop preview popup when you hover your mouse over the Task View icon on the taskbar. Click on the thumbnail for the desktop in question.
You can also switch using the full-screen desktop preview after clicking on the desktops preview button. This is less efficient than the previous method, but it does have the advantage of showing you a bigger preview of the windows, making it easier to tell what’s on each desktop.
Giving Each Desktop Its Own Wallpaper
Another way to make identifying desktops easier, or at least personalize them to your taste, is to give each desktop its own background.
You don’t do this by using the usual Personalize option from the desktop itself. Instead, open the desktop preview mode or Task View and right-click on the desktop thumbnail you want to change the desktop background for.
Select Choose Background and then select backgrounds from those provided or your own sources, using the Background menu.
Now that desktop has its own background.
Showing One App on Multiple Desktops
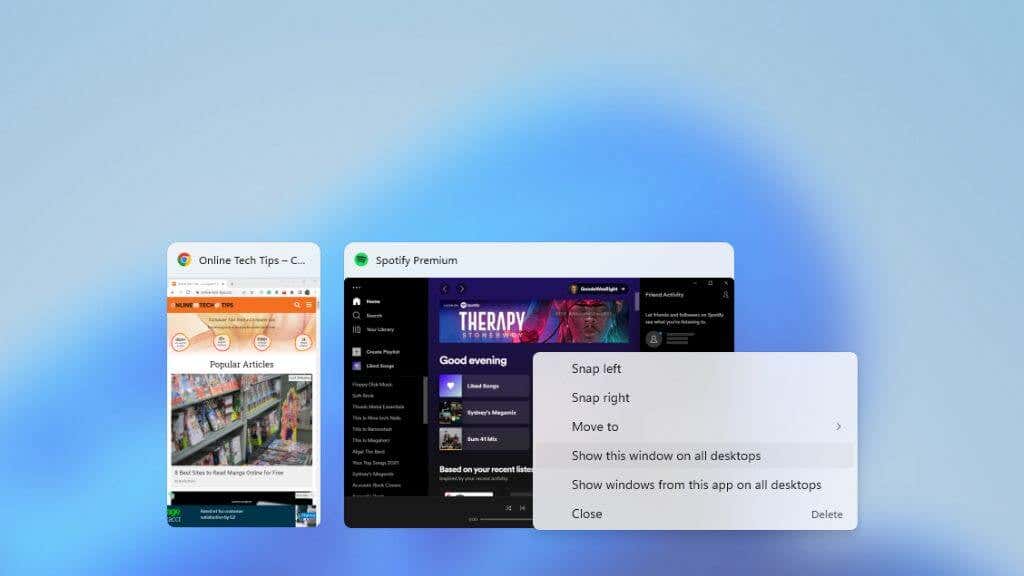
Usually, each desktop will have its own unique set of open apps and Windows, but sometimes you want a particular app to be available on multiple desktops. A good example would be Spotify or your calendar app.
You have to switch to Task View, then right-click on the app in question. Select Show this Window on all desktops.
You can also choose Show windows from this app on all desktops, ensuring that apps that generate multiple windows, such as web browsers, spawn them on all desktops.
Moving Apps Between Desktops
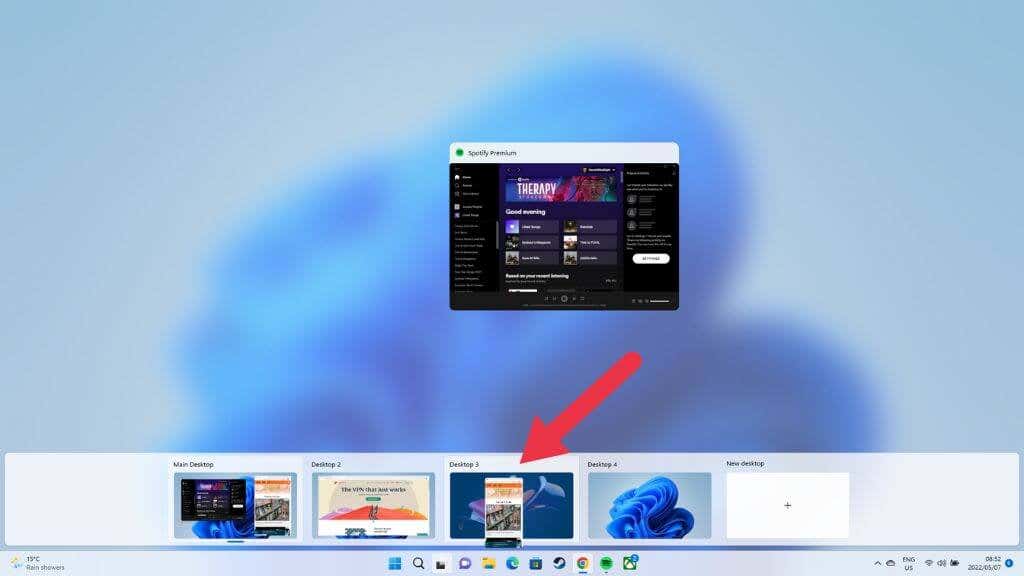
If you don’t want an app to appear on all desktops but want to move it to another desktop, you don’t have to close and reopen it—instead, open Task view. Then drag and drop the apps from the selected desktop into the thumbnail of the destination desktop.
Your app will then appear on the new desktop.
Closing a Virtual Desktop
When you’re done with a particular virtual desktop, you can close it. The fastest method is to hover your pointer over the virtual desktops button, then highlight the desktop you want to close by moving the mouse pointer over it.
Click the small “X” at the upper right corner to close the desktop, just like you’d close a regular window.
What Happens When You Close a Desktop With Open Apps?
You don’t need to close or move the apps on a desktop that you want to close. When you close a virtual desktop, all of the open windows and apps on that desktop shift to the desktop one step earlier in the queue.
So if you want those apps on a particular desktop, you’ll want to reorder them so that the desktop you wish to close is to the right of the one you want to receive those apps.
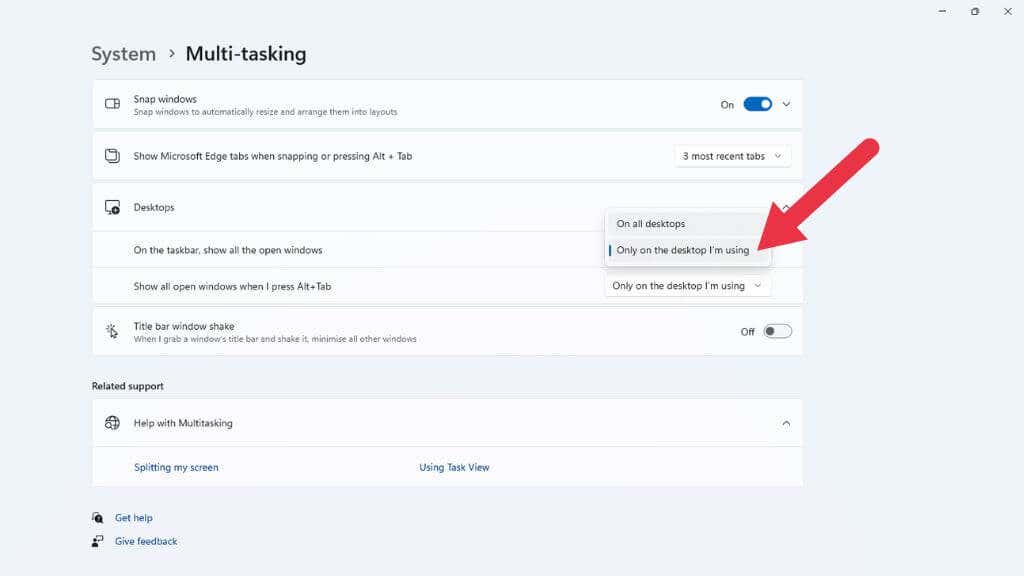
Show All Apps on the Taskbar Across All Desktops
By default, the taskbar of a virtual desktop shows only the apps and windows open on that desktop. If you want to see every open app on your Taskbar, regardless of which virtual desktop you’re currently using, you can do that.
Open the Start Menu and go to Settings App > System > Multitasking > Desktops > On the taskbar, show all the open windows > On all desktops.
Another helpful setting in this location is the toggle to make all open Windows on your computer appear when you use the Alt + Tab key to change between applications, rather than just the ones from the active virtual desktop.
Multi-Monitor Limitations
In general, virtual desktops in Windows 11 are great, but they do have one significant limitation. If you have a multiple monitor setup, each virtual desktop spans all of your screens. In other words, when you switch between virtual desktops, you switch on all your displays simultaneously.
By contrast, Apple’s macOS operating system has virtual desktops dedicated to each monitor, so you only switch on the currently active screen.
The only approximate workaround in Windows 11 is to move apps around in Task View or have the same apps appear across multiple virtual desktops, so you can, for example) keep your mail app open on your second screen when you switch desktops.
source
https://helpdeskgeek.com/windows-11/how-to-set-up-windows-11-virtual-desktops/


Σχόλια
Δημοσίευση σχολίου