Out of the many possibilities for creating an interesting video with the editing software Adobe Premiere Pro CC, creating a composite video can be a method used in many situations. Putting a video inside another video is extremely useful for editing special effects, but actually getting started with this technique may feel a bit overwhelming. Especially if you’re a beginner video editor in Premiere, this tutorial can help you get a handle on creating composite video in the program.
Creating this effect will need to use masks and mask tracking, which isn’t necessarily difficult but does take some time. However, with these steps outlined below, you’ll be able to make your composite video editing effect easily and get an interesting and professional-looking end result that’s social media ready.
How to Embed a Video Inside a Video
To begin, make sure you upload videos you want to use for the composite in your media bin in your new project. You can follow these next steps to add your first video and create a mask.
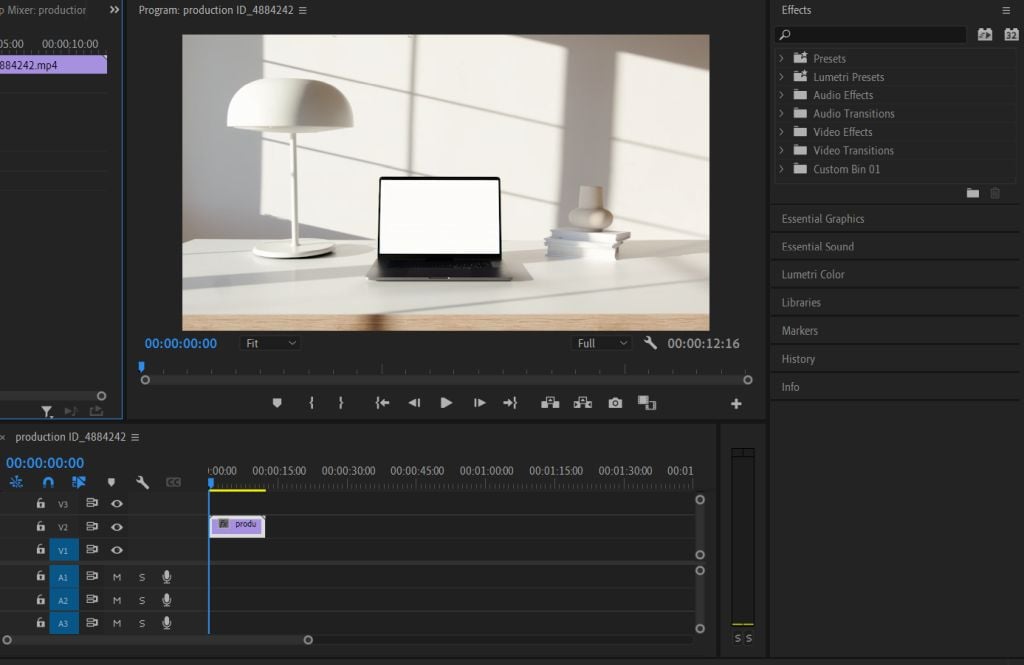
- Add the video you want to place the second video onto first, on the V2 track in the timeline. Make sure you have trimmed the clip or selected in and out points to your desired length.
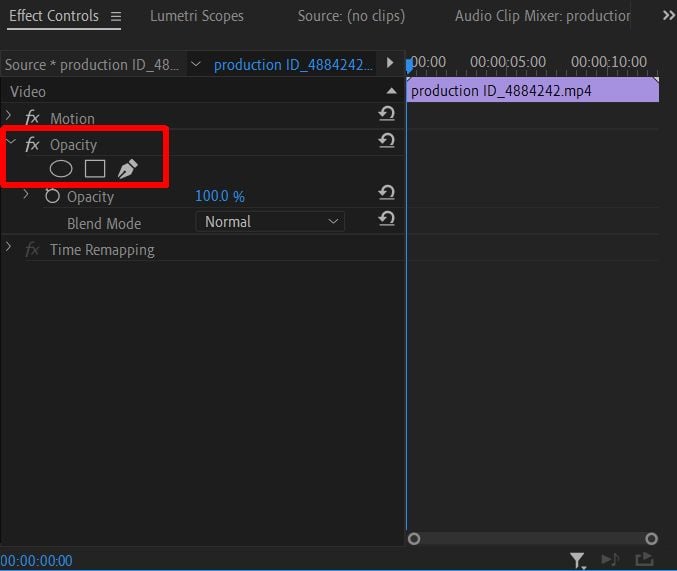
- Select this clip, then open the Effect Controls panel.
- Look under Opacity and you’ll see icons of an ellipse, rectangle, or pen (free draw). Select one that fits the object you will be masking, which is where you want the second video to go.
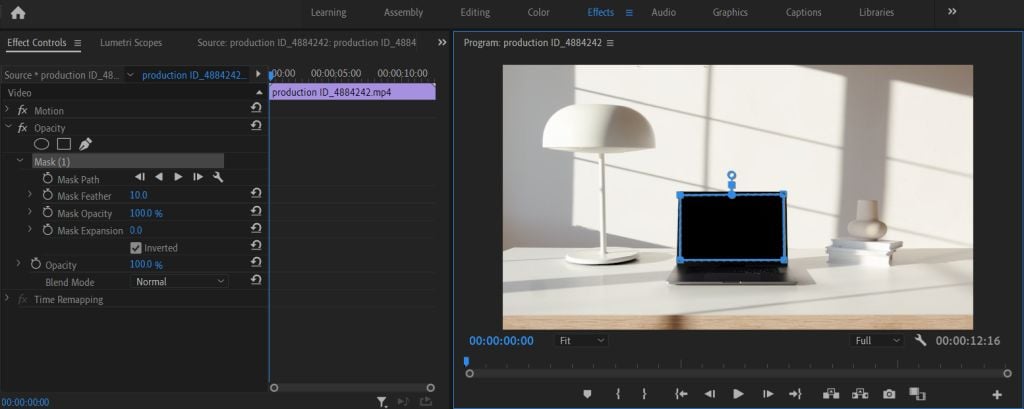
- Using your selected tool, create a mask that covers the area you want the second video to go.
- If your masked object is moving in the video, you’ll have to do some mask tracking. In the Effect Controls panel, click on the wrench icon next to the Mask Path option and select an option in the dropdown menu that will work for your object. Then click on the play button to the left of the wrench.
- You can use the Playback option to see how the mask tracking looks during playback, and if you need to fix anything you can use the preview controls to move the points where needed.
Now that you’ve created the mask, you will be able to go ahead and add in your second video.
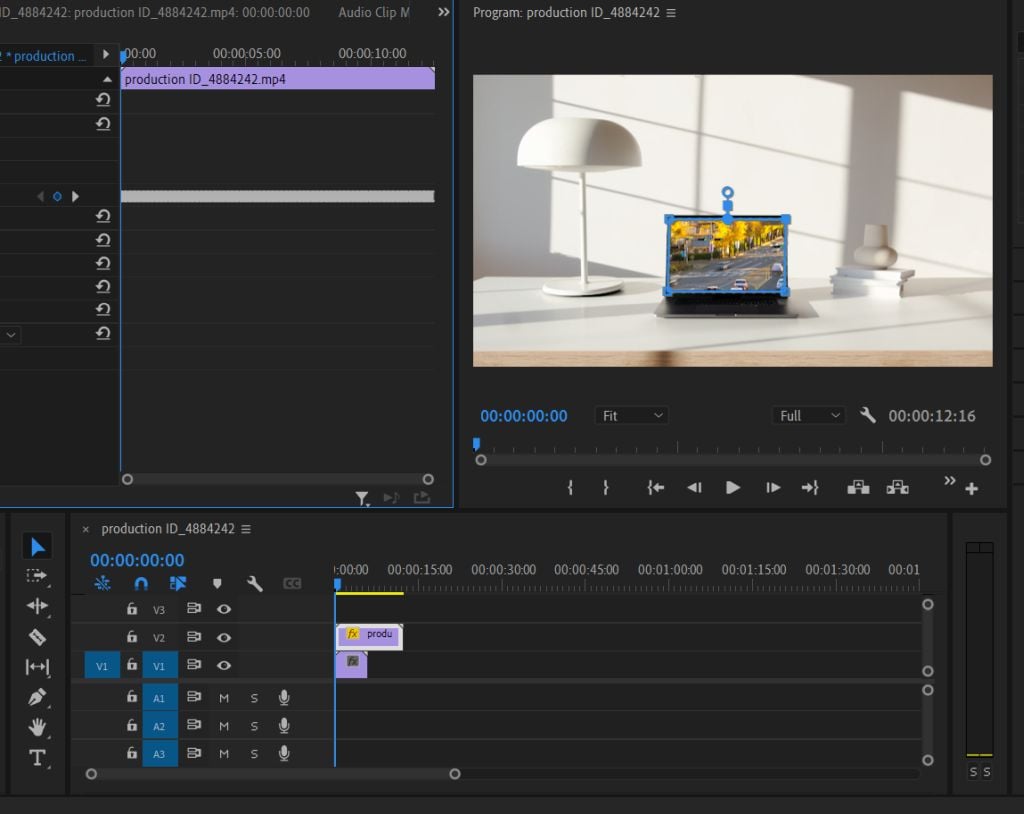
- Place the second video on the V1 track in the timeline beneath your first video.
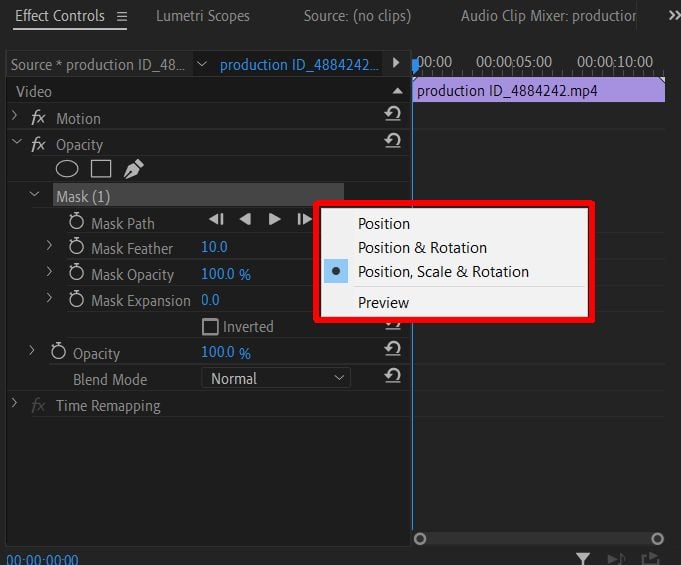
- Now you’ll be able to see how the video looks through the mask you created. In order to position it correctly in your video, use the Position, Scale, and Rotation tools in Effects tab. If you use mask tracking with a moving object, you may also need to use keyframes to keep the positioning of the second video in line with the object.
If you aren’t familiar with using keyframes, check out our article covering the topic. Keyframes can be used to animate certain effects if needed.
Tips for Creating a Composite Video
The steps above will allow you to create a basic composition, however, there are some more things you’ll want to keep in mind that can help you fine-tune your video.
Use Lumetri Color
When you first put two separate video clips together, it’s very likely the colors won’t exactly match up. This could make the composite look less harmonious. However, if you use Lumertri color to do some color correction work on one or both of the videos to get them to match up better, this can help a lot with any inconsistencies.
You can use the basic color correction options to change things more subtly, or you can add some presets to the video to change the overall look.
Feather Your Mask
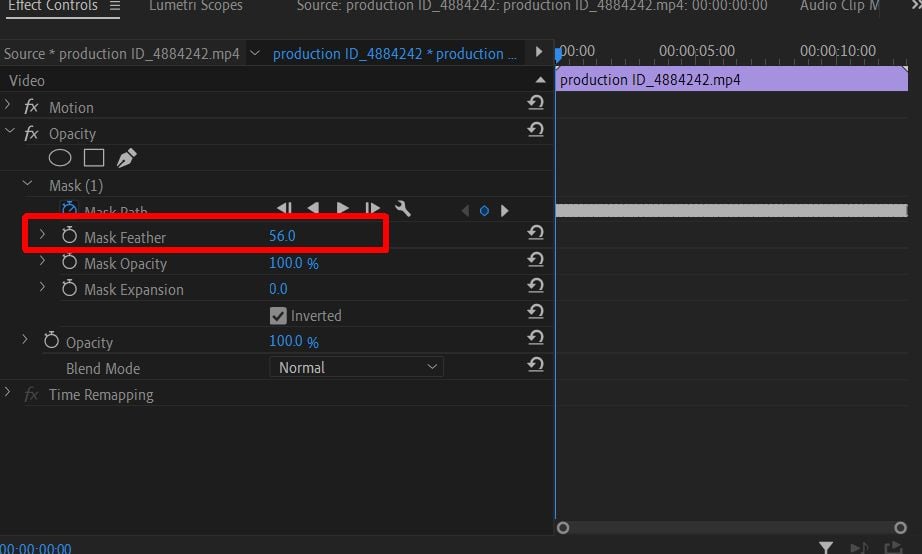
When you first create your mask, you’ll see an option called Mask Feather. This will feather out the edges of the mask as much as you set it. Doing this can help blend the added video into the first and make it look more seamless.
You’ll want to increase the Mask Feather until the edges are just slightly blurred, so it’s less noticeable. Of course, if your specific project calls for it, you can feather as much or as little as you want.
Take Your Time With Mask Tracking
We get it, mask tracking can be a tedious ordeal. But it’s worth it for a tidy end result. When you are doing mask tracking, it’s best to make sure it is being tracked smoothly. Changing the keyframes of the tracking when needed will ensure this, and you can keep playing back the preview and tweaking the tracking until it looks smooth.
Create Special Effects With Composite Videos
The ability to piece two or more videos together can allow for tons of creative uses in video content, and really the sky’s the limit when creating composite video. The better you get at it, the more advanced effects you can make too. This tutorial should give you a good working foundation to start with and improve composite video creation.
from Online Tech Tips https://ift.tt/nTdcMiL


Σχόλια
Δημοσίευση σχολίου